Monday, April 6, 2015

Sons of Orar Bone Basing


 Step 0: Prime Black
Step 1: Base coat with Steel Legion Drab (SLD)
 Step 2: Shade panels with Zandri Dust (ZD). Make sure to leave SLD showing in places.
 Step 3: Shade panels with Screaming Skull (SS). When shading make sure that as many dark edges meet light edges. 


Step 4: Mix a weathering powder wash using Secret Weapon Miniatures Green Earth Pigment (GEP).  Add enough thinner to the water/powder mixture that surface tension is broken so the pigment flows easily.

The last step is to neatly edge the bases using Steel Legion Drab.

Saturday, April 4, 2015

Floor Mats for Fields


After a great game of Bolt Action with the first showing of my 101st Airborne Division, I thought it was time to make a few more fields. (If you want to read a really good write up about the game, and even see a cool animation of me dropping scale parachutes to determine troop deployment go visit Steve's blog)

As before, these fields were made out of a Home Depot dark grey rubber floor mat, that was first sprayed brown using Krylon paint. Each row received a a first pass of colored static grass, followed by either green flock, or more static grass. I am getting pretty close to the point where I need to start making proper bocage to intersperse between the fields. Fields provide nothing rules-wise, but they really add to the visual appeal of the table.

Friday, March 27, 2015

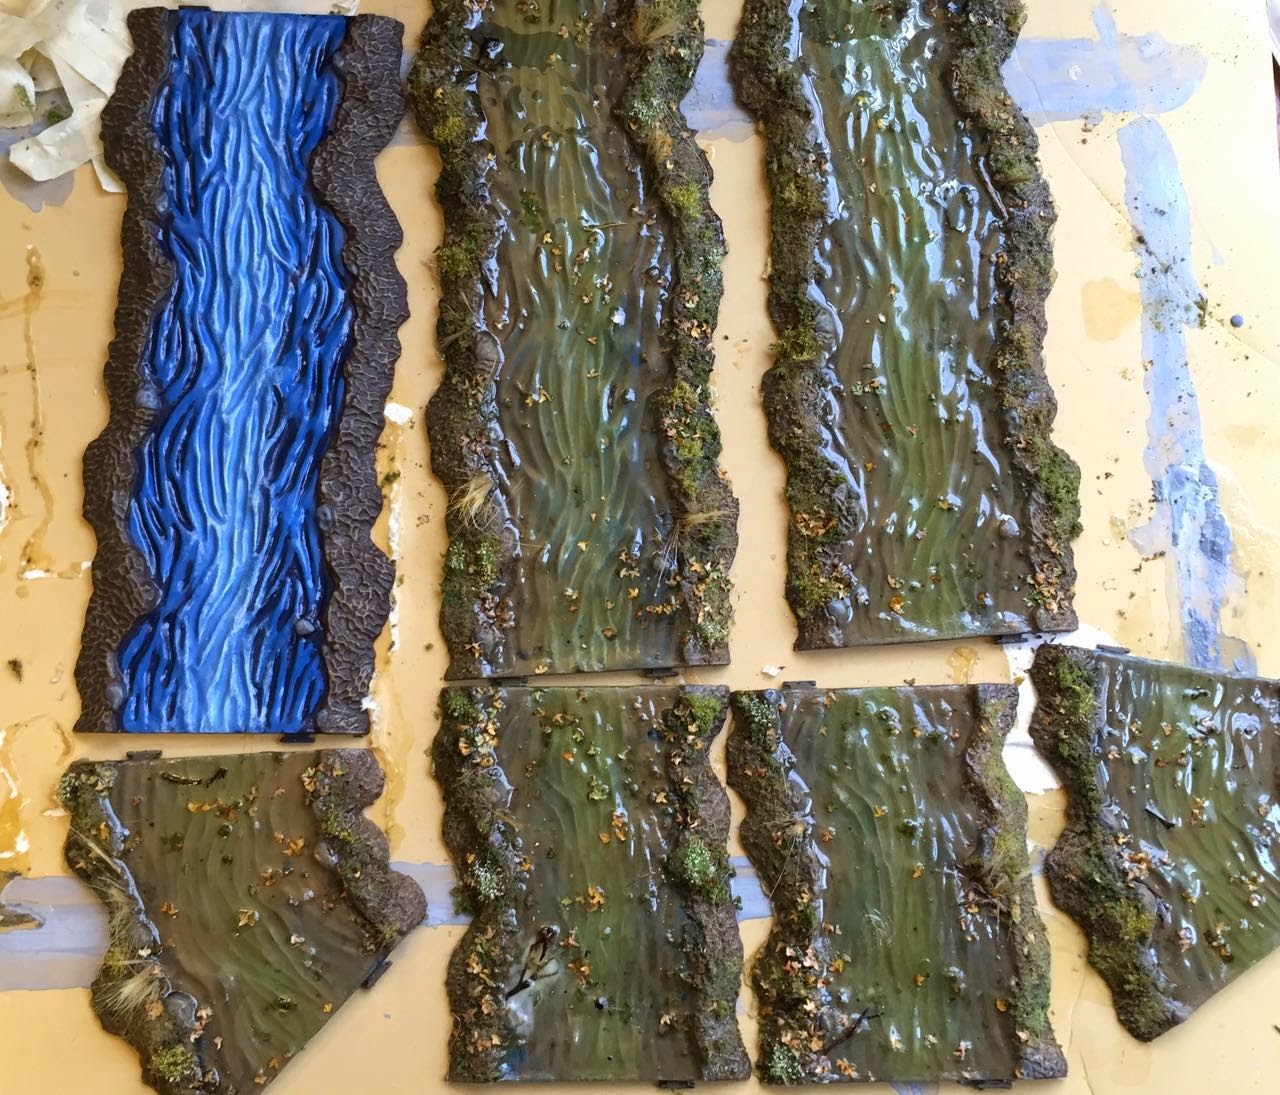
Upgrading Pre-painted River Terrain


Sometimes you just don't want to scratch build it. I know I could have made river sections by hand, but it was far easier to just buy the Pegasus river sections and re-paint them. In the photo above you can see the dangerously blue Pegasus painted version of the river. My fix was simple. Using an airbrush I sprayed on steel legion drab on the riverbed, and then added a bit of turquoise to the very center of the river. After that was done, I layered in static grass, flock, and autumn colored leaves. Just to make thinks interesting I poured my remaining stock of Realistic Water from SWM, followed by Water Effects by GW all over the sections. After waiting a week, I had the very usable, and much improved sections on the right. One more box of river sections to go, and I'll have some new usable terrain.

Was it worth it? What do you think?

Friday, March 20, 2015

Sons of Orar


A Terminator and a spare Rhino side hull were used for this experiment. There were several goals. One of those was to use as much GW paint as possible, and the other was to keep the the mix of colors to a minimum. 


Sons of Orar have white as part of their heraldry. Rather than use full on white, the area is based with fortress grey, and then mostly covered with Ulthuan Grey. A touch of white is used around the edges. It is important to use as little white as possible. White will be used during paint chipping, so it needs to contrast with the grey beneath it. On shoulder pads, whit is only used a the extreme top of the pad. The majority of the pad being left a grayish color.

The main body of the rhino was painted with only two colors. The black basecoat, and mephiston red. The color modulation was achieved using a diluted mephiston red mixture in an air brush. Anywhere two panels came together, more coats of mephiston red went on.


The bottom sides of the smoke stacks were masked off so a gradient could be added.


The gradient is on the right.


With only two panels of the rhino hull completed, the benefits of modulation can already be shown.


Finished color modulation. Wild Rider red was used to highlight rivets. I recommend using this on faces, and front panels of tanks. As the extreme highlight it should be kept minimal. The next step is a gloss coat to protect the paint from oils. Behold the ugliness which is gloss.


A satin coat was sprayed on to dull down the gloss. Vallejo has a blueish tint to their dull and satin coats. I will not use them again for future Sons of Orar, as it interferes with the color too much.


Steel Legion drab was sprayed to add dust to the lower area of the hull. Pigments will be used as well, but I like the tinting the paint does to the the white door and the lower hull.


Side by side with a Sons of Orar Terminator. The pigment used here is Secret Weapon Miniatures green earth.


Rubicon Models Panzer III For Bolt Action


I painted this Panzer III a while back for the Cold Wars event. During games it turned out to be very very effective. I know most ww2 enthusiasts love Tigers, but the Panzer III was the workhorse of the DAK, so it fits my image of desert warfare better.

The trees are part of my ongoing terrain upgrade project. I have been slowly amassing a stockpile of high quality terrain in order to have better battlefields. These trees are really easy to make.


  • Branches from woodland scenics
  • flock of whatever color you like
  • static grass in a variety of lighter colors than your flock.
  • Brown weathering powder 
  • anti-slip sand
  • Heavy washer


The trees are dipped in diluted white glue, and then have flock added to them. In the case of the autumn trees, I used orange flock followed by static grass.

The trees are glued to large metal washers for support. The metal of the washer is coated in a mix of sand, brown weathering powder, and glue. Drippings of flock, tree bits, etc are added to the base while wet.


Monday, March 9, 2015

Bolt Action DAK Display Board


I attended Cold Wars up in Pennsylvania this weekend. I came in 2nd place in painting behind Steve's extra cool Australian desert rat force. Kudos to Steve for setting the bar higher.  I decided to put a display board together the day before I had to drive up to Pennsylvania. Our gaming group's Tobruk table has been under design for a while, so I thought it would be a good time to test out some of the techniques. I am really happy with how this came out. It was my first time attempting water, so it was a big leap.

Stuff that worked:

  • Magic merlin as a sealant all over the board
  • small slate, large slate, and sand along the sides of the road
  • first pour of the water effects. 
  • Tallarn desert paint with Secret Weapon Burning sands weathering powder. 


Stuff that failed:

  • foam at the waters edge (Vallejo Foam, you are out!)
So what about Cold Wars? It was eye opening. It was great. It was full of snow. Hopefully Dave Taylor will post some photos on his blog so everyone can see some of the inspiring tables. Some of the game masters have spent years putting their tables and scenarios together, and it shows. Game Mastered events are just better. The Bolt Action tournament had lovely asymmetrical terrain, but suffered from 40k-styled uber-lists, and weird scenarios.  


Wednesday, March 4, 2015

Cold Wars Convention: Bolt Action Soviet Army in 48 Hours


I've decided to attend Cold Wars, up in Lancaster PA this weekend, and thought it would be fun to complete at Soviet force for Bolt Action. A while ago Steve and I painted the Warlord Games starter set for a friends 30th birthday. For my army, I wanted to see if I could paint the entire force in two days. That force consists of over 120 troops, one tank, and two artillery pieces. Unlike Owen's force, I decided to give Plastic Soldier Company a go, purchasing their troops. The only Warlord piece in the army is the T34.

What you see here is the result. After realizing the PSC miniatures were sub-par, I decide to just paint fast and loose. I figured that if I did not paint them all at once, that virtually any other miniature on my painting backlog would take priority. This was a paint or eBay moment! The models only cost ~$70 for 3 boxes, so it certainly an economical way to build an army.

Almost all of this force was painted by airbrush. I used the experiment to practice my skills. At the end I did use oils to blend the colors together. That was hit and miss based on the softness of the detail. In the end, all 120+ troops were completed in under 24 hours of painting time. I had to wait for the artillery pieces and the tank to come in, but those took an additional 8 hours of work. I met my goal. An entire Soviet Bolt action force painted in under 48 hours. Given that I had 6 of every pose, and the models themselves were not that good, I used a little trick to spice them up. The brightest spots on the models are the white and yellow flowers. I did this to draw the eye away from the unseemly models themselves. I think it might have worked. Normally I would want to highlight the model's face, but here I wanted the model to slip into the background.

So, you've seen the models, these will never win a painting award, or even come close. They will look good massed on the table top preparing to assault German forces. The will provide hours of fun for our gaming groups.

For all the warts, I am pretty pleased with the experiment. Ironically I now have a larger Soviet force than my DAK force. I'll have to solve that problem right after I complete my 101st airborne.


Monday, February 9, 2015

Macharius Heavy Tank


Some days you just have to paint a one off. The model had been languishing in my display cabinet for quite some time. Rust streaks and grime have not been applied yet, but those are coming. The Macharius is one of my favorite models so it is nice having it finally presentable.