


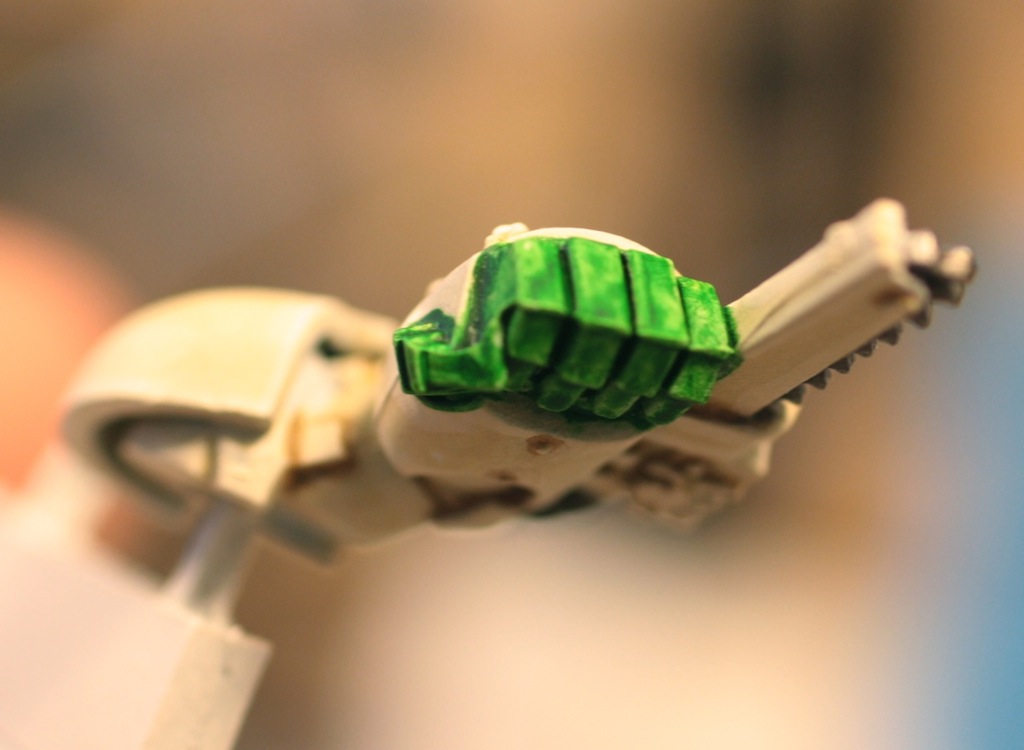
 I've never tried to paint OSL effects on any of my miniatures. However after reading Ron's tutorial over at FTW today I decided to give it a shot. Like most GW fanatics, I have a load of extra power fists, chain fists, and assorted other bits. In order to make my attempt as close to Ron's as possible I decided to paint a chain fist. The bonus was that if this worked well I could rip an arm off one of my terminators and give him with some glowing action.
- I started with a thinned down dark angels green wash on all the hand parts, painting from the interior out as the tutorial suggested.
- Then I took scorpion green and painted the major plates on the hand sections, leaving the darker green in the recesses.
- Once this was done I added increasing amounts of yellow to the mix in order to lighten the green, painting all the edges of the hand, and som parts of the chain fist casing with this color.
- At the very end I added white to the mix to increase the brightness.
- In order to achieve the glow, I used Tamiya thinner to make a wash of the scorpion green/yellow mix, and glazed the portions I thought would be hit by the light.
I am not sure I like my version of OSL, but it was a fun experiment. My recommendation to everyone out there is to paint up old bits! Use them as test pieces. I am going to paint up a helmet now and see if I can make glowing eyes look good.
First attempt? Nice job. You are almost there with this one. Some minor tweaks and you'll have something very convincing.
ReplyDeleteMind if I take your pics and use them in a follow up post on FTW?
I'd like to clarify some things on the light itself as it plays off surfaces?
Ron
Use whatever you need! I think the whole community will benefit from your tweaks!
ReplyDeleteThe thing is: contrast. OSL looks best against darker colours.
ReplyDeleteIt took me a second. Looking at your pictures in progression, the effect seemed to get worse. Of course, after I read your steps, I see that the WIP pictures go from bottom to the finished pic on top.
ReplyDelete*bonk self*
Lookin' good, but I gotta agree with Esty in that it would look even better against a dark model.
A dark model just adds some additional contrast. If you can get the technique correct, the color of armour (light or dark) doens't really matter.
ReplyDeleteThats impressive for a first attempt! I hope my first attempt goes that well! Thanks for sharing this. :)
ReplyDelete