A blog dedicated to model building and painting. It has evolved from 40k, and now encompasses 30k, historical, and scale model building.
Showing posts with label Bolt Action. Show all posts
Showing posts with label Bolt Action. Show all posts
Wednesday, June 18, 2025
Tiny Tank Commander
Warlord included this little guy on the easy eight sprue. I'd usually skip the tank commanders because the scales never fit well between the vehicle and the figure. However, after watching Fury, I had to paint him up.
Wednesday, October 9, 2019
Oil Dot Color Modulation
I've wanted to dive deep into other painting styles for a while, so I decided to experiment with oil dot color modulation. Both of these tanks were painted to test the technique. The Ferdinand, green camouflage, was painted first copying another painter's style. The Tiger tank was painted more in line with how I normally paint, and then received oil dots on top of it. In person the Ferdinand looks more realistic, but the Tiger makes a better 2' impression. These images are much larger than the actual models, but that was needed so I could share the surface texture change.
The basics of the technique are to paint the model, then add several other oil colors in a polkadot pattern all over the surface of the tank. The oil dots are then blended into the surface using a soft brush, slightly changing the color of the surface. This is basically a distributed multi-color filter that can be wiped off.
I think this was an interesting experiment, and rather than grab more models from my 1/72 scale tank bin to experiment further, I think I should jump right in to trying it out on a large 28mm 40k model of some type.
Wednesday, December 12, 2018
Crushed Glass Snow Effect on Winter War Germans
To give these guys a proper winter war effect, I grabbed some SWM crushed glass, which was last used years ago on a NOVA Open charity model. I mixed it with water effects, and tried to dab it onto the bases as realistically as I could. One thing the snow does, is make it hard to see the miniature on top. I'm wondering if maybe I need to add more snow and just cover up all the leaves and rocks I added during the first basing step. These guys looks like a total mess from three feet, but rather nice up close. That is an effect I am not too keen on. It is one of the reasons I rarely paint camouflage. When camo works, it ruins the model.
So, where are we with the army? I have one more squad to add snow to, and I then I need to decide what to do with the remaining vehicles. I love how they look pre white washing, so it is hard to jump in and cover all that careful work up with sloppy white.
Does anyone else field winter armies?
Tuesday, December 11, 2018
Another Winter White Wash Snow Camo Attempt
I wasn't thrill with my first attempt, so I air brushed on some more white wash, and set about chipping the paint. I followed up with winter streaking grime from AK-Interactive, and a lot of mud. I haven't added crushed glass to the model yet, but that will stand in for snow mixed in with the mud on the road wheels. This looks better, but is definitely outside my wheelhouse. How does this attempt stack up to the last one?
Saturday, December 8, 2018
Experimenting With Washable White Winter Camo
I'm in the process of painting a winter war german force, and figured it was time to experiment with Mig's washable white camo. I decided to grab an old panther from the shelf and test it out. After a few minutes scrubbing the white off with a wet brush, here is the result. I'm not sure about it. It doesn't resonate with me. Do I need to remove more of the white? Where am I going wrong?
Monday, January 8, 2018
Bolt Action Sherman Tank eBay Experiment
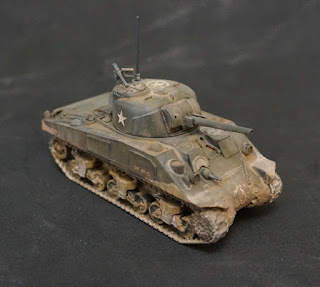
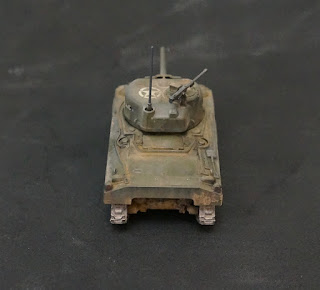
After selling a bunch of old terribly painted club miniatures, I figured I should find out how my nicely painted Bolt Action stuff would do. I have five of these Warlord Games Sherman tanks, so one of them was drafted to be part of the experiment. I rarely play Bolt Action with more than one tank per side, so five was a bit extravagant. I realize this breaks up the platoon, but sacrifices must be made in my year of zero sum hobby spending. The only money I can spend this year on my hobby, is money I have earned selling models. I think that will be a fun experiment. In the worst case scenario, I will have at least started thinning out my collections. Anyone else doing a zero-spend year?
Thursday, August 10, 2017
Bolt Action Panther WIP 2
The Panther is coming along nicely. I had some trouble with the spare tracks, but I think some dark washes will smooth them out a bit. The barrel of the gun needs to be reworked as well. Oil stains, and some more mud stains are still needed for the hull. I was thinking about trying to make tiny foliage branches for the model, but that might distract from the painting too much.
Will this model ever see the table top? Probably not. I do have a 'new' winter German force to paint that will eventually end up used for gaming. Most of my WW2 games are 1/72 scale these days, but I have a substantial backlog of 28mm models in the back log.
Wednesday, August 9, 2017
Bolt Action Panther WIP 1
I've had this resin Panther G sitting in my drawer for a long time, and figured it was time. Unlike most of Bolt Action forces, I wanted to weather this guy with paint chipping solution. So after carefully spraying on a whole lot of variable rust colors, I sprayed on three heavy coats of Mig absolute chipping. However, when it came time to chip the top layer of paint away I couldn't get it to work. I don't know what caused the paint to become un-chippable, but after using this same solution on both Death Guard vehicles, I was pretty confident in my technique. What you see on the model here is chipping done by hand. It is no where near as interesting as that which is caused naturally, but I can't leave the tank un-chipped.
I haven't decided if I want to add some kind of camouflage to the Panther, or if I should just heavily weather this guy. I was thinking about using a green squiggly pattern, or potentially hard edged green camo. A hard edge would allow me to try paint chipping solution again. That is somewhat desirable, but I wonder what it would look like to have both chipping effects side by side.
Wednesday, June 21, 2017
3D Printed Terrain Painted
I've been printing out loads of terrain on my 3D printer, but this is my first finished piece. This building represents a French town hall typically found in Normandy and will be used in our WW2 club games. I wasn't sure how well the print would take paint, so I painted this fast and loose using a giant brush and very little care. This was completed in about two hours. For a piece costing around fifty cents of material, I think it works pretty well. I did have to sand the raw print and fill in some holes using green stuff.
I guess the question now is whether this terrain is good enough for a board, or if I should go back to buying resin pieces? I like this more than MDF buildings, but maybe I should experiment with some kind of hybrid MDF+FFF.
Wednesday, June 14, 2017
3D Printed Terrain is Here
Since I'm currently printing in PLA, the only way to finish a model is to sand it. However, once this spool is done, I'm going to switch to ABS (lego plastic), which can be smoothed using acetone. With that with, the time between printing a model, and having it ready to paint will be nominal.
I'm still dialing in my printer, so the quality keeps improving. I've even printed out some printer parts to upgrade the printer itself!
Labels:
1/72 Scale,
3D Printing,
Bolt Action,
terrain
Wednesday, March 8, 2017
Soviet T-28 Post Oils WIP 2
Instead of using enamels on this tank, I decided to give oils a try. I'm very pleased with the results. If you look closely you should be able to see where I used blue oil paint to shade parts of the turret. Now imagine the green a fair bit darker, with blues in the shadows and light green only on the edges. Anything I happened to paint black would use blue, but this time for highlights.
Dark Angles. That is what is next.
Subscribe to:
Posts (Atom)


