Showing posts with label basing. Show all posts

Friday, June 25, 2021

Basing With Dirt


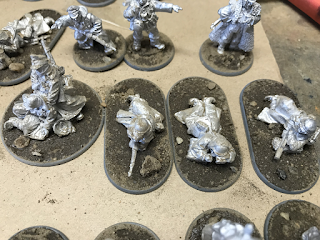
Sometimes the laziest method works surprisingly well. After completing most of my Praetorians, I turned my attention to basing them. I had initially planned on making new scenic bases and casting them. I even started the process of doing that. Then inspiration struck. I live in a desert. My guard live in a desert. Let's just crab some dirt from outside and super glue it down. I'm surprised by how much I like it. The test base looks pretty good to my eyes. I think I'll add more rubble and junk to the bases, but with just a few tufts only these work. Here's to effortless basing!

Wednesday, November 21, 2018

Basing With Dirt


It surprises me that more folks painting miniatures don't base with dirt. When I want a dirt like texture, the best way to achieve that is to just use dirt. Nothing complex here at all. I just wander into the median near my home a grab a few spoonfuls of dirt. I use elmers white glue to affix the dirt, and a soft brush to clean off the models afterwards.

Sometimes I don't even paint the dirt.

Dirt: The ultimate weathering powder.

Thursday, February 8, 2018

Custom Bases Painted With Pigments


In a twist of fate, the pigment I normally use on my 30k miniatures, Green Earth, turned reddish orange when applied to the bases using an alcohol wash. To try and tilt the color back towards yellow, I made a water/alcohol wash and applied some more Green Earth mixed with some Yellow Earth. So here we are now, with a blotchy yellowish tone. I like it. The yellow plays off the blue of the ultramarines really well. Now it had been my intention to make these bases work with my older ultramarines bases, as well as my 30k bases. That goal was not met, but I am ready to base these guys an move on.

Friday, February 2, 2018

Casting Bases Using Dental Plaster


The process of making moulds can be pretty easy if you are interested in casting dental plaster and don't intend to use a pressure pot or vacuum chamber. I decided to create a full set of master bases for use across my 40k and 30k armies. I won't use these for all of my miniatures, but it is extremely nice to have a set of bases ready to go whenever I want to create some. An added benefit is that while my regular bases are normally fragile, the solid dental plaster bases are not. These are incredibly durable. Also, since my bases are supposed to be concrete, as they get scratched the grey color material underneath looks like fresh cracked cement adding to the overall effect. 


Step 1: Make master bases


 Step 2: Build mould boxes


Step 3: Spray a coat of primer over the boxes to ensure that any super glue used during construction of the bases or the boxes is covered. Superglue will cause the silicone to cure badly, leaving soft uncured goop where it touches.


Step 4: Mix your silicone. I used two different types of silicone here, one that cures in 6 hours and another that cures in a slightly shorter time. I believe the purple dense one is OOMO 30.


Step 5: After waiting over night, release the silicone from the mould. Try to save your masters. They can be used if desired. (I won't, my masters get dumped straight into storage)


Step 6: Using Excalibur dental plaster start pouring bases. The key to a nice flat base is to overfill it and then after the plaster has started to separate from the water and sink into the moulds, to gently scrape the surface using a flat edge.


 Step 7: Paint. The small 25mm base on the right is one of the new bases. The 50mm base on the left is one of my old bases from several years ago. The 25mm base wasn't even primed. That cement is raw plaster with a dose of Secret Weapon Miniatures Green Earth pigment washed over the top. I then went back and scraped the base with an x-acto knife to add some designs.


Wednesday, January 31, 2018

Making Cracked Cement Bases


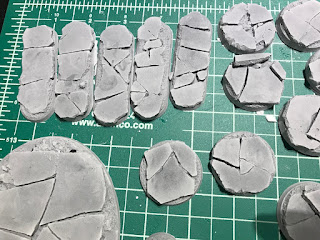
I've had a bunch of nearly finished miniatures awaiting bases for quite some time. Today I decided it was time to take care of that. To create these, I started with thin sheets of cast dental plaster. Using pliers and clippers I broke up the plaster in order to create these designs. I then used the debris from breaking them up mixed with anti-skid sand additive to fill in the holes. I think I have enough designs for an entire army now. Once these are dry, I'll clean them up and prep them for casting. My goal is to have an easy to use set of mould that I can break out and cast whenever I need them.

So, did I miss any base sizes? I think I got them all, but you never know with this strange new Games-Workshop.

Wednesday, July 12, 2017

Experiment: Making Mud


I experimented today making mud and rusty barbed wire bases for my Death Guard project. My first attempt included adding realistic water tinted yellow to all of the likely areas to have pooled water. That proved to be too busy, so I removed the water and stuck with varying browns and oranges. The edges aren't cleaned up, but I think when they are these will look pretty good. They contrast really nicely with the cool greens and purples already on the models. I'll base most of the models in place, rather than making the bases separately. However once I do that there is no turning back.