Tuesday, February 8, 2011

Kit Bashed Librarian Dreadnought Part 1


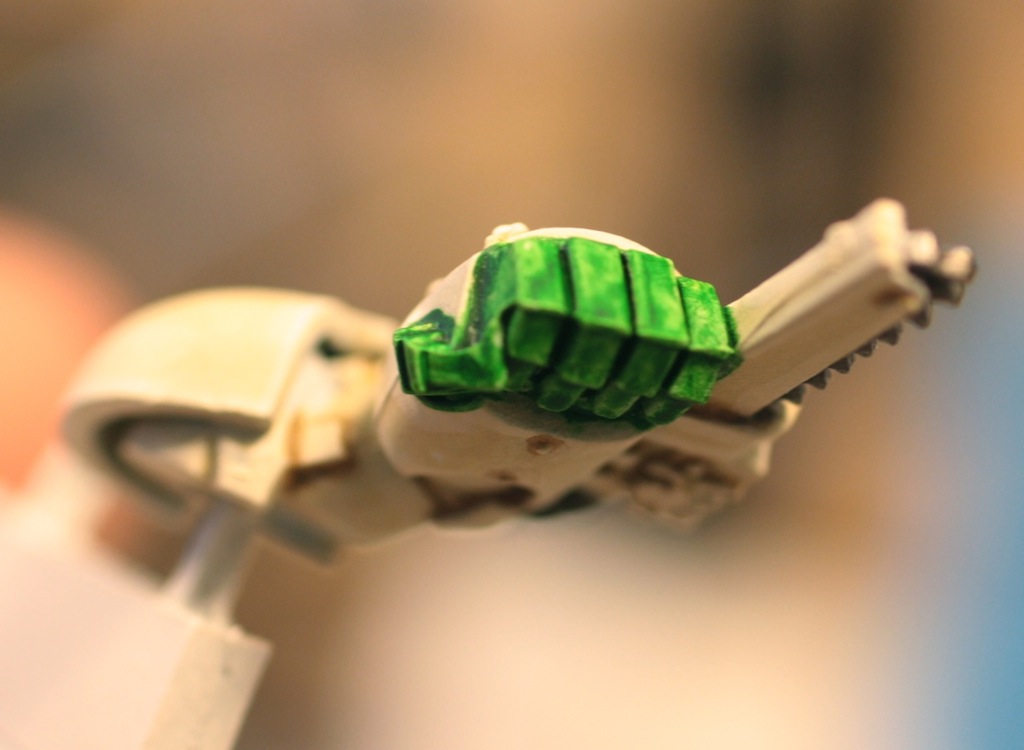
I started a new Blood Angel's army when I first got back into 40k after a long hiatus, and consequently after a few years my painting style had changed. Since my first BA dread with FW CCW, I have moved on to heavy air brushing, and shading, giving a slightly comic book feel to the force. In preparation for my first libby dread, I purchased on dreadnought FW CCW and one Grey Knight dreadnought force weapon. I have had these pieces sitting in a box for ages.

As it turns out, work has been pretty busy, so I have not been able to make it out to the GW store. Rather than pass up the opportunity, I decided to finally convert my own libby anyway. This guy will eventually be towed behind a storm raven, but that requires me to have some time to shop.

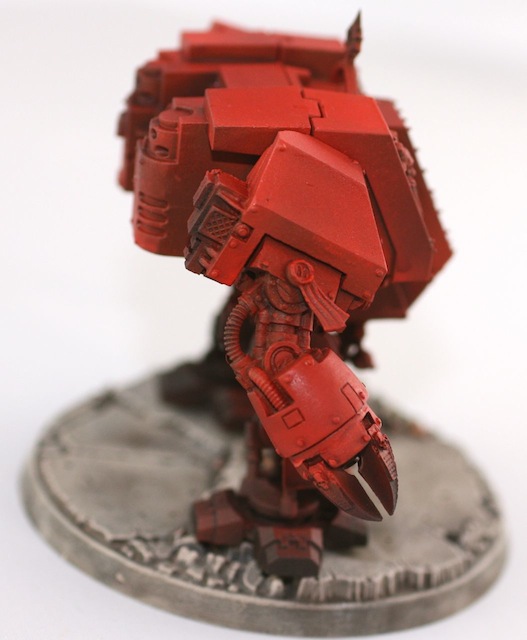
My new BA recipe is the same for vehicles as it is for dreads or troops.

  1. Prime Black
  2. Spray Gore Red lightly, keeping as much black as possible.
  3. Spray Blood Red
  4. Mix in Blazing Orange into the airbrush and highlight edges.
  5. Spray with diluted baal red (this step is probably a bad idea! since it removes a lot of the shading in favor of richer color)
I have held off putting battle damage on my new BA, but I think I am going to go with chardon granite followed by chainmail. Som heavy streaking of black will follow.

Tuesday, February 1, 2011

WIP Techpriest


Since I had a bunch of resin bases, I needed something to put on them. A few minutes of rummaging, and voila, the techpriest I purchased ages ago for my IG. This guy got a really fast and sloppy paint job, so I have a lot of cleanup work and final highlighting to do, but as he is, I kind of like him. I've found that the older metal miniatures are weird in that they have both more detail, and worse castings. With plastics, the older models are just barren of detail.

So in game terms, does anyone use this guy in their army lists? Is there ever a reason to take one? In fluff terms I feel the need to paint up as many priests from Mars as possible, but they seem kind of weak in game. the problem with having this guy, and all of the advisors I recently painted is that I now want to field them!

Monday, January 31, 2011

Deathwing Chaplain and Squad


I painted up some test bases to go with both my Astral Claws and my Dark Angels. Previously I had been creating custom bases for each miniature every time I needed one. The power of home resin casting has freed me from that now! The Deathwing squad above used individual custom bases, and while they look nice, I wanted a way to create a base quickly that showed off the miniatures. The Rhino top hatch base shown below is meant for a hero character, since it allows for dynamic poses. I used one of the new flatter bases for the chaplain, since his pose was rather static, and I was unable to pry his torso off of his legs for repositioning! I am really pleased with how he came out.


The rest of the Deathwing are a little lighter in color than my other squads, but I am just happy to have three squads instead of two. I think I may have to get a game in once I paint up that venerable dread lurking to the side of my painting area.

Sunday, January 30, 2011

Home Made Resin Bases


I finished and based my dark angels terminator chaplain, and then followed him up with another squad of deathwing terminators. The problem was that I was out of bases. Normally I make a load of bases ahead of time, and then have them ready for miniatures as I finish them. This time I decided to create resin molds of ruined space marine equipment. These bases will find dual use on my Astral Claws chapter, which is why some of them are desert brown. The deathwing bases I paint dark, with loads of rust.

Custom bases are just too cool!

Saturday, January 22, 2011

Plastic DA Chaplain WIP


The new DA FAQ has me pretending I am going to play games again, so I decided to paint up an Interrogator Chaplain as my second HQ to hand with Belial. I grabbed an old BA FW crux, the torso from a Chaos terminator, a chaos marine head, and a chaos maul. I added little bits of cloth that came from who knows where, and a key from some fantasy kit. I don't exactly hate the model, but it just doesn't look right to me. There is no mistaking it on the battlefield, so maybe I'll keep this guy as a sort f weirdly static icon of death.

Thursday, January 20, 2011

Updated Glowing Power fist

Ron, graciously shared his suggestions on how to improve the glowing power fist I painted in response to his first article, and though I did not have a lot of painting time, I did have enough time to throw down a layer of bleached bone on areas that should not see the glow. The painting is not complete, as real life intruded, but I am much happier with the results already.

Tuesday, January 18, 2011

Badab War Fire Hawk Test Mini


I put down the first base coat for my first Fire Hawks marine last night. The hawks have a pretty demanding paint job, so I had to rely on the air brush to help with the first layers. I have quite a bit of work to do, including more flames, and then targeted washes to tone the whole mini down. I thought the base coat looked pretty interesting, so I thought I should share it with the community. Hopefully once the washes are on I will like the scheme. I am going to keep painting chapters out of IA 9/10 and will periodically post them up if they are not too terrible.

Monday, January 17, 2011

OSL DW Chainfist Using Ron's FTW Technique


I've never tried to paint OSL effects on any of my miniatures. However after reading Ron's tutorial over at FTW today I decided to give it a shot. Like most GW fanatics, I have a load of extra power fists, chain fists, and assorted other bits. In order to make my attempt as close to Ron's as possible I decided to paint a chain fist. The bonus was that if this worked well I could rip an arm off one of my terminators and give him with some glowing action.

  1. I started with a thinned down dark angels green wash on all the hand parts, painting from the interior out as the tutorial suggested.
  2. Then I took scorpion green and painted the major plates on the hand sections, leaving the darker green in the recesses.
  3. Once this was done I added increasing amounts of yellow to the mix in order to lighten the green, painting all the edges of the hand, and som parts of the chain fist casing with this color.
  4. At the very end I added white to the mix to increase the brightness.
  5. In order to achieve the glow, I used Tamiya thinner to make a wash of the scorpion green/yellow mix, and glazed the portions I thought would be hit by the light.
I am not sure I like my version of OSL, but it was a fun experiment. My recommendation to everyone out there is to paint up old bits! Use them as test pieces. I am going to paint up a helmet now and see if I can make glowing eyes look good.